Advanced Insights
How Motion Science™ Cured My Forehand Blues
An Application of Martial Arts Principles to Tennis
by Stephen G. Pellegrini
My Forehand Blues
Recently I resumed playing tennis with my family after a layoff of eighteen months. I have played tennis competitively in high school and college, and even taught professionally, but most of my play since college has been purely recreational. On and off over the years I have been plagued with a hitch in my forehand ground stroke: my wrist will intermittently break or turn up (palm facing up) as I make contact with the ball. (Generally, a firm wrist is desired. This ensures control of the racquet head and correct placement of the forehand shot.) The wrist break usually results in the ball going into the net or sailing long out of bounds. I have had numerous coaches and pros help me correct this problem, and have read many books and articles in hopes of correcting it. Quite honestly, nothing has really helped. With the recent recurrence of the problem I decided to see if my martial arts training, and Mr. Nackord’s Motion Science, could help me arrive at a solution. I am happy to report that the experiment was a success, and I have developed a cure for my forehand problem thanks to Motion Science.
 |
This article illustrates how Motion Science can help athletes in other sports. However, we can apply to our martial arts training the same introspection and process as laid out here. | 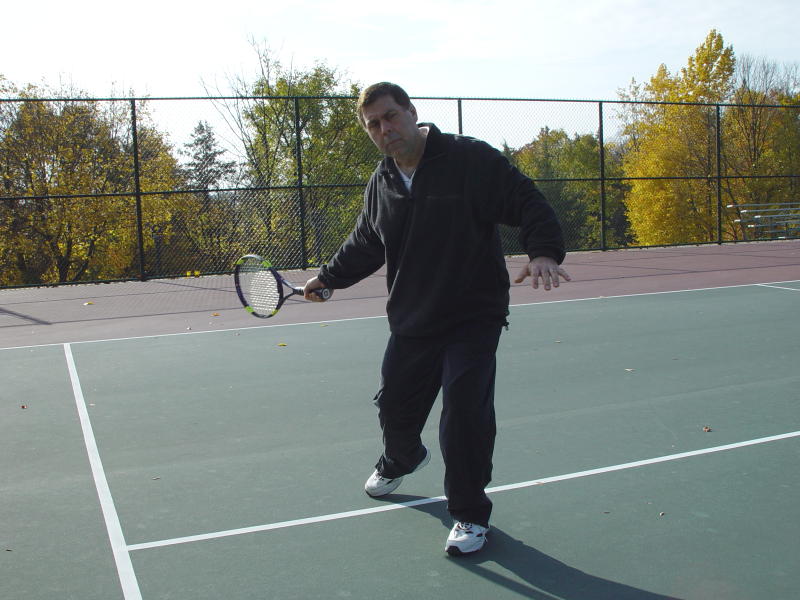 |
What is Motion Science?
Before detailing the steps of my experiment with Motion Science and tennis, let’s review what Motion Science is, from my perspective as an athlete of any sport, not just the martial arts. Motion Science categorizes the analysis and learning sequence of athletic motion into the following stages:
- Level I: Geometry of Motion–This is the descriptive phase. Here motion is described in terms of the lines, positions, and paths of the movement as seen by an external observer who is new and unfamiliar with the movement. This is how instructors or students should approach learning a new movement or technique. Level I can be broken down into Lower Body movement (stances, foot and leg maneuvers, and foot and leg strikes) and Upper Body movement (blocks and parries, hand and arm strikes, and locks, chokes, and holds).
- Level II: Physics and Psychology of Motion–This is the theoretical phase where motion is explained and understood. Analyzing motion in terms of power, speed, conditioning, timing, accuracy, and attitude helps us understand how the movement occurs and how we can improve its execution. This is motion as seen from an internal or personal frame of reference, i.e., our own understanding of the dynamics of motion. Armed with this understanding we can make adjustments as needed. Level II is broken down into the Physical Attributes of movement (power, speed, conditioning) and the Mental Attributes of movement (timing, accuracy, and attitude).
- Level III: The Strategy and Application of Motion–This provides an understanding of motion in relation to an opponent (or opponents). It helps us to understand how to apply the motion in a tactical situation when confronted with an adversary, and why certain tactics work better than others given the type of opponent, environment, personal resources (experience, skill level, conditioning), etc. This level of motion is entirely relational and adaptive. These are the mental skills that gifted martial artists and great athletes practice on an intuitive level during the demands of combat or competition. Motion Science attempts to take the practitioner “inside” this process and understand how to adapt to the actions of your opponent.
Required Tools
For the purpose of correcting my forehand problem, I applied Level I and Level II principles to the problem. I was only concerned with hitting a forehand consistently and correctly, not tactically handling an opponent.
Two tools were needed and instrumental: a video camera mounted on a tripod and a ball machine. The ball machine was indispensable. This was a recent acquisition that has proved to be well worth the investment. It’s portable and uses a rechargeable battery for easy setup. It delivered hundreds of balls to the same location, allowing me to repeat the motion consistently.
The Forehand Ground Stroke: Motion Science Level I–Paths, Lines and Positions
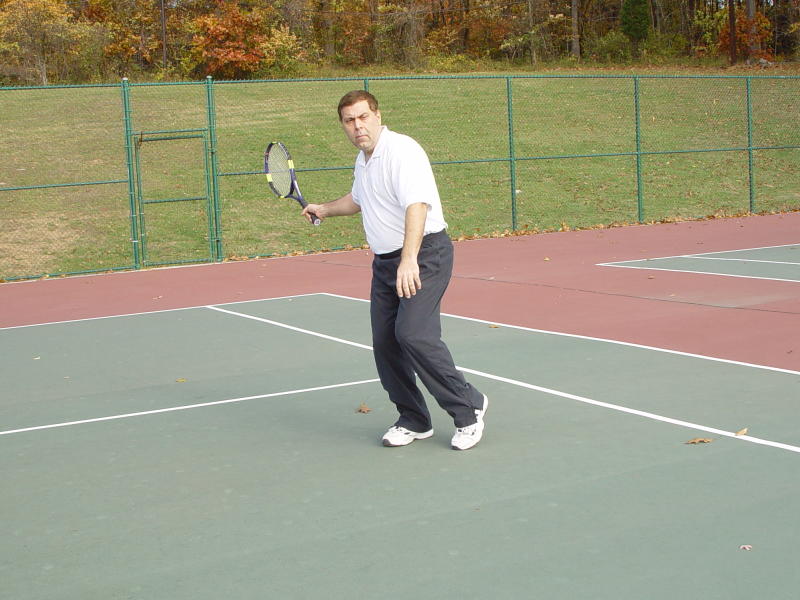
This was the first stage of reviewing my forehand. Was my footwork correct? Was my body alignment sound? What about the movement of my arm and the path of the racquet–were they correct? Since I am right-handed, my descriptions will be based on movement from this side.
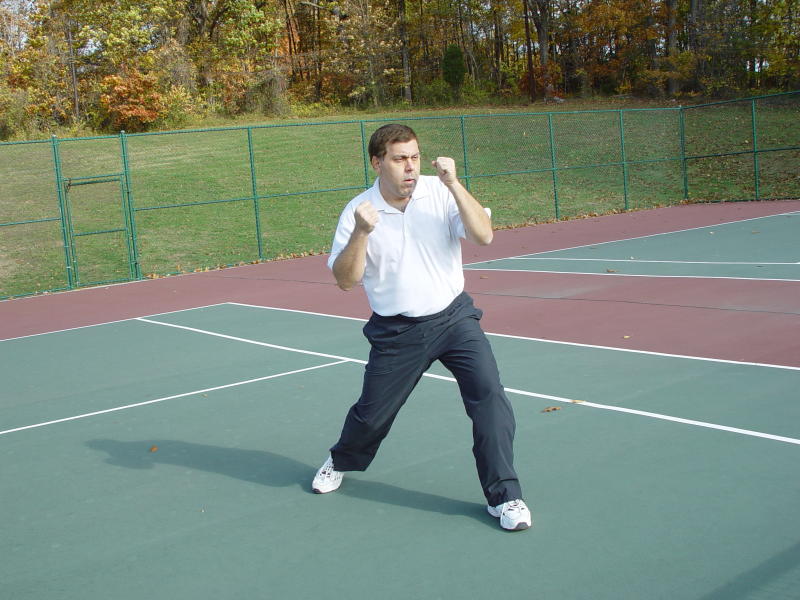
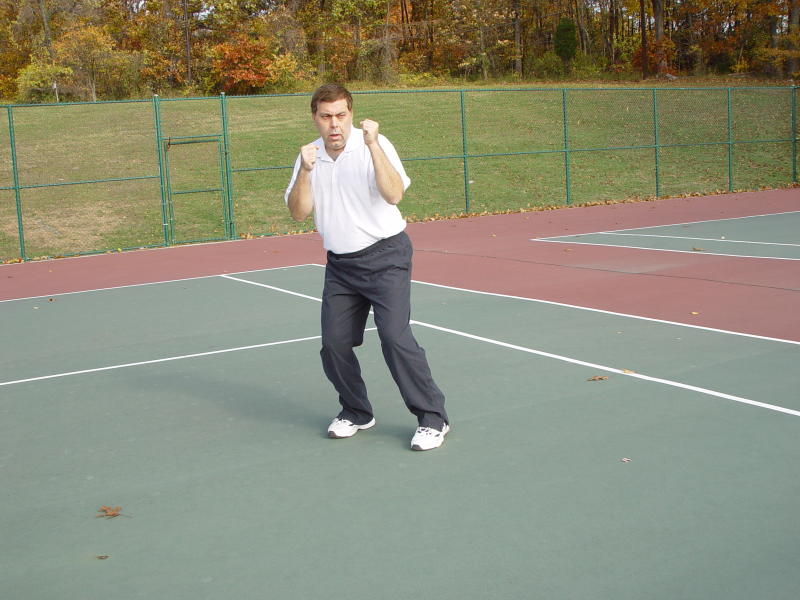
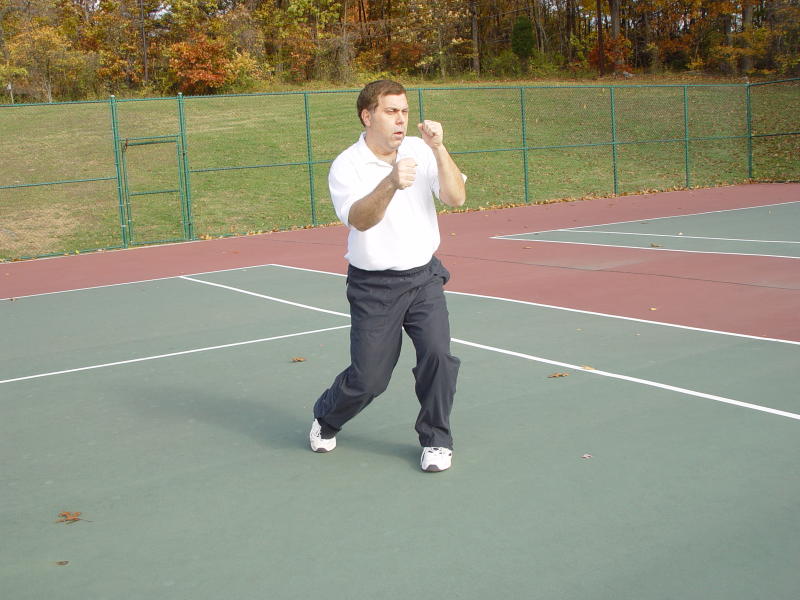
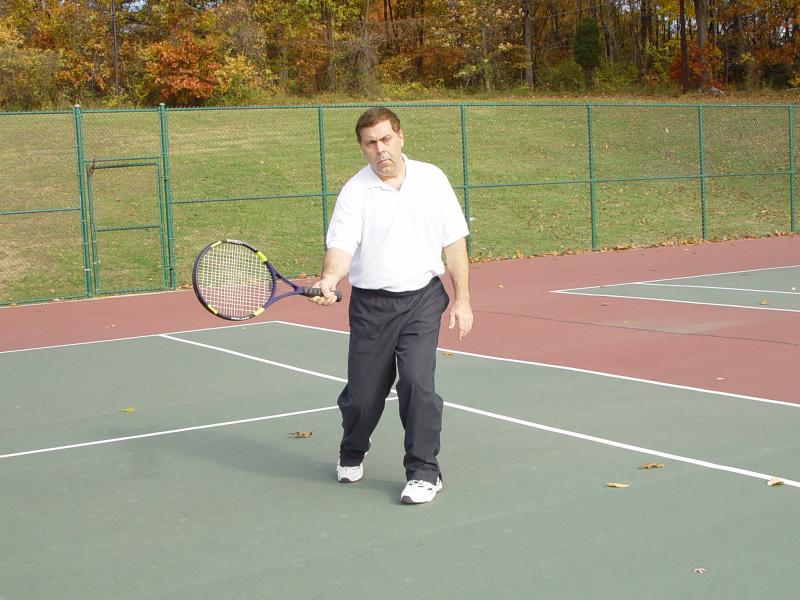
- Footwork–As the ball is moving toward you on a line, imagine a set of railroad tracks with the ball on the outside track and your feet moving along the inside track parallel to the flight of the ball.. The movement of your feet is similar to executing a right counter punch. You first must place your weight on the back foot. Next, step forward along the inside track with your left foot pointed 45 degrees to the inside track. This front foot position is important since it allows transfer of the weight from the rear to the front foot. Your knees should be bent as well to facilitate weight transfer from rear foot to front foot. Next, your rear foot drags forward as your weight transfers to your front foot. In martial arts this would be referred to as a step-drag foot maneuver. Comparing my footwork to this ideal description resulted in a no problem assessment. In general, my footwork was correct.
- Body Position–After examining my footwork, body positioning was next. From the ready position facing the net and waiting for the shot, turn your body perpendicular to the flight of the ball and plant your rear foot on the inside railroad track parallel to the flight of the ball. At this point your shoulders should also be parallel to the flight of the ball. As you move forward to hit the ball with a step-drag foot maneuver, your hips and shoulders will rotate toward the flight of the ball as your racquet comes forward to meet the ball. As your complete your swing your shoulders should end up perpendicular to the flight of the ball. Once again I could not find anything substantially wrong in my body position.
-
Racquet Path–This is a bit trickier. Ideally your racquet
should move back along the path of the ball, round the corner in a type of “C”
motion, and move forward along the ball’s flight to meet it at the point on the
ball’s path where your front foot is perpendicular to this line of flight. The
racquet should be perpendicular to the flight of the ball at all times. After
meeting the ball in the middle part of the bottom of the “C”, the racquet
continues forward with a slight upward path. This imparts “topspin” to the ball
and causes it to drop safely into your opponent’s court without going long or
“sailing” out. While the start of racquet path should ideally travel as
described, ultimately what produces a successful shot is the second part of the
racquet movement.
Here was the first clue to my problem. When my wrist break occurred, it appeared that my racquet was meeting the ball “late” at point 6-12 inches back from the ideal point in front of my body on the line perpendicular to the flight of the ball where my front foot landed.
| ||
| The footwork and body positioning are similar when throwing a counterpunch (above) and when hitting a tennis ball (below). The physics of the human body and power generation are consistent regardless of the sport. | ||
|
Motion Science Level II – Physics of Motion: Power, Speed, and Conditioning
One of the good things about Motion Science is that it gives you a checklist for monitoring your fundamentals or basics, and a way to look at elements of your fundamentals individually without trying to run everything together. The Motion Science Level I review of my forehand did not reveal any glaring weaknesses, except a small problem with my racquet path that seemed to occur intermittently. Generally, my forehand was sound. However, I was surprised to see how much my racquet deviated from the “correct” path, and how much it improved in a single drill with consistent repetition. Motion Science Level II, the physics of motion deals with power, speed, and conditioning. Checking each of these elements of physical motion was my next task.
- Conditioning helps ensure performance continuity, i.e., repeating the movement over time without your body giving out. I had to be honest with myself here–my conditioning is only average. I have decent flexibility and muscle tone; however, my cardiovascular conditioning is not very good. I am hoping that increasing my level of play with tennis will improve this. But for now, I have to be realistic and not expect to be able to repeat a forehand drill with a machine for 15 straight minutes. I found that hitting about 25-30 forehands over a 4-5 minute period was about my limit. After this my form broke down and I needed to catch my breath. So, after 30 shots I reset the machine and started over.
- Speed was next on my checklist. Motion Science divides speed into 3 components: miles-per-hour speed, reaction speed, and initial speed. Miles-per-hour speed is the time it takes to cover a specific distance. Reaction timing speed is how long it takes to react to a movement. Initial speed is how long it takes to go from non-action to action. It occurred to me that speed would only be a factor if I were not able to get into position to hit the shot. Was my racquet back, my rear foot planted, and my front foot moving in a line parallel to the path of the ball in time to hit it correctly? The answer was yes. It would seem speed was not my problem.
-
Power for athletic performance is created "simply by moving
through the dimensions of width, depth, and height" (as explained in Mr.
Nackord's articles elsewhere in this web site). All three dimensions–height,
width, and depth–come into play when hitting a tennis ball with a forehand
ground stroke. First, you bend your knees and transfer your body weight into
your legs, then step toward the ball transferring the body weight to the
forward leg (depth), and at the same time rotate on your vertical axis as you
hit the ball.
As I compared my movements in each of these three dimensions I found areas of improvements in all three. There were times when I did not bend my knees very well (use height to create power). Consequently, my stroke was not as solid–it lacked power and fell short once it crossed the net. Also, as I stepped into the ball (depth) when I hit it, I did not always rotate completely on my axis (width). It seemed that this was occurring when I was reaching for the ball and consequently my vertical axis was no longer vertical. I made a mental note to keep my back straight when hitting the ball and follow through to the target. Keeping my back straight made me visualize my body relative to the ball more correctly and allowed me to follow through better. I found myself moving better and not depending on adjusting my body angle to reach the ball. This produced a big improvement in the power of my stroke. I found it going deeper and faster with seemingly less effort.
Motion Science Level II – Psychology of Motion: Timing, Accuracy, and Attitude
- Attitude in Motion Science is synonymous with being mentally focused, relaxed, and confident. Motion Science uses a technique called “Guided Imagery Training” to develop a mental link between a physical anchor (such as touching your ear or twirling your racquet) and an emotional state of focus, relaxation, and confidence brought on through visualization. I have been practicing this technique and have found that it is effective. It takes practice and concentration to perform the mental exercise. I use my anchor at the beginning of a practice session, after any breaks, and if I lose my concentration and find that my technique has dropped.
- Accuracy in Motion Science is like most sports–success in hitting the target. At this level of review of my forehand I was not trying for a high level of accuracy. If my shot was deep (close to the base line of the court), low (a foot or so above the net), and generally in the direction I was trying to hit the ball, I considered my shot to be accurate. As my shot mechanics improved, so did my accuracy.
-
Timing in Motion Science is concerned with external or
environmental timing–i.e., how we move in relationship to events around us.
Timing in this sense is how we adjust the coordination of our movements in
relationship to the movement of the ball or our opponent. Motion Science
divides timing into three phases–moving after an opponent, moving at the same
time as an opponent, and moving before an opponent.
How do these three phases of timing apply to a tennis shot, in this case a forehand ground stroke? The earlier you arrive at the intended point of contact, with your shot prepared (racquet back and ready to stroke the ball), the more time you have to move into the shot with the proper footwork, body alignment, and correct follow-through after contact with the ball. While this is a basic concept taught to many–“prepare early” for your shot, how do you create the time needed? Should you just run faster or improve your conditioning? These options are not open to most players, especially aging players who are past the point of significant gains in conditioning and speed. However, they are not beyond significant improvements in their timing.
If you watch most average players rally, you will notice almost all move after the opponent when staying on the baseline. The other two (more advanced) timing phases are usually reserved for approach shots to the net (moving in behind your approach shot before your opponent hits the ball), and some net play. I found that making a conscious effort to move at the same time as my opponent significantly “sped up” my play. I was better prepared to hit the ball, and in most cases found I was moving into my shot, utilizing the power principles of depth and width more easily–generating pace on the shot with seemingly less effort.
Weekend players such as I will have to think of timing as a “mental skill” that they consciously apply to their shot making. Eventually, this conscious skill will develop into a subconscious “habit” and speed up overall play.
Motion Science Checklist Review
A quick review of my Motion Science Checklist review of my forehand summarizes my problem areas.
| Motion Science Category | Principle | Problem |
|---|---|---|
| Level I: Geometry of Motion | Footwork | No |
| Body Positions | No | |
| Hands and Arms | Needs improvement - meet ball forward of body |
|
| Level II: Physics of Motion | Conditioning | Needs improvement - cardio vascular |
| Speed | No | |
| Power | Needs improvement - bend my knees - keep my back straight - follow through |
|
| Attitude | No | |
| Accuracy | No | |
| Timing | Yes |
The Solution
As I review my Motion Science checklist above it is easy for me to summarize how to improve my forehand.
- Meet the ball in front of my body–this is Motion Science Level I, The Geometry of Motion, that focuses on the positions, paths, and lines of motion. In this case it is the hands and arm position that need adjusting.
- Generate power more effectively in my stroke by bending my knees, stepping forward to meet the ball, and following through by rotating my hips and shoulders to face the net as I finish my stroke. This is Motion Science Level II – the Physics of Motion. In this case, we are applying how to generate power by using height, depth, and width.
- Give myself more time to execute the stroke correctly by improving my timing–trying to move to the ball as my opponent is hitting their shot instead of waiting until after the shot is completed and traveling toward me before starting to move to the ball. This may sound like a subtle distinction, but it can effectively give you 25% or more time to complete your ground stroke.
Most good tennis coaches might have come to the same conclusions as I did in my personal analysis. The advantage to having this Motion Science checklist is that an individual unskilled in assessing movement can get a huge head start on identifying performance problems.